|
<< Click to Display Table of Contents >> Sanction |
  
|
|
<< Click to Display Table of Contents >> Sanction |
|
Click on the Sanction button, the Charges and their verdicts will open in a browser pop up.
![]()
Figure 219 - Sanction button
For every “Misconduct Nature” selected, there must be a verdict. Click on the “Guilty” or “Not Guilty” radio button for each nature.
Click “Continue”
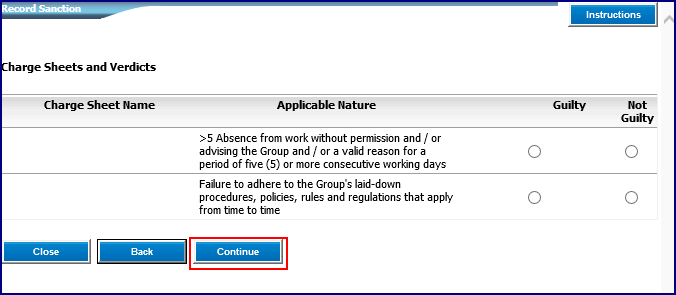
Figure 220 - Charge Sheets and Verdicts
“Sanction Details” must now be completed.
The suggested sanction based on the company’s own disciplinary code will appear in the “sanction to be taken” drop down list. This list will also include alternative sanctions that according to the company’s own disciplinary code could be applicable given the procedure followed.
If an alternative sanction to the suggested sanction is selected, the “Record Mitigating and Aggravating Circumstances” block appears and becomes a compulsory field. The screen will be reorganised placing this block above the sanction to be taken.
Record the Mitigating or Aggravating Circumstances. This is not a mandatory field.
Thereafter record the date the sanction will be issued i.e the date when the sanction will be valid from, complete all other mandatory fields, and click on “Continue”.
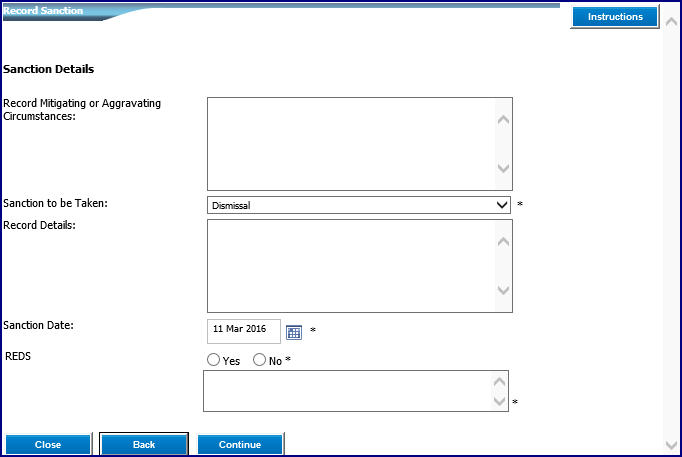
Figure 221 - Record Sanction
On the next screen the Disciplinary Form can be viewed and printed to serve on the employee or it can be emailed. The form will be pre-populated with the relevant case details.
View Form
Click on the “View Form” button.
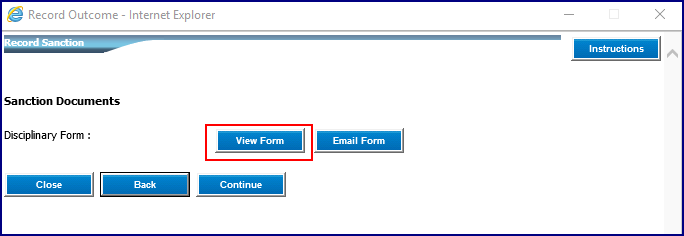
Figure 222 - Record Sanction - View Form
Open or save the file. Click on “Open” or “Save”. Clicking on “Save as” allows the user to rename the document.

Figure 223 - Open the document
When completed click “Close” to close the pop up.
Email Form
When emailing the case emailer will appear. Complete the “Message Details” tab.
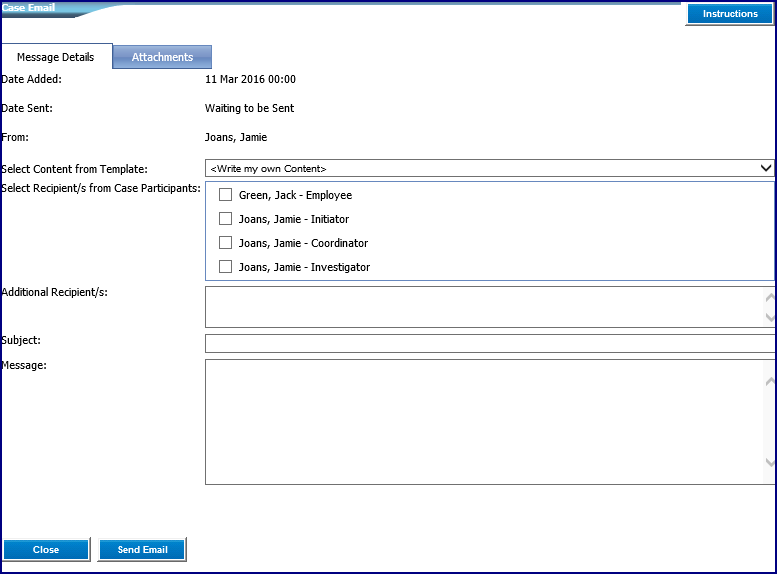
Figure 224 – Message Detail
In the the “Attachments” tab select the required case documents and add any other documentation as required.
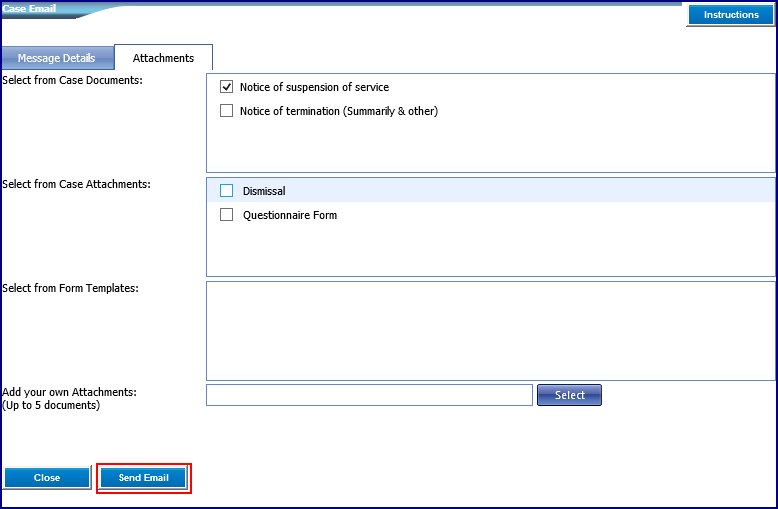
Figure 225 - Attachments
Click on “Send Email”
Once the form is viewed, printed or emailed, the signed form must be attached back to the case. Close the sanction function at this stage, or click continue to proceed.
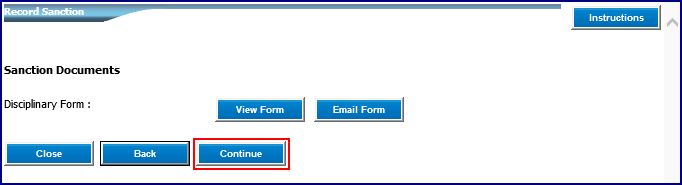
Figure 226 – Continue to proceed
Closing the sanction function or clicking “Continue”, the next screen allows the user to attach the Signed Form to the Sanction Summary.
Once attached click “Continue” and the sanction will be finalised.
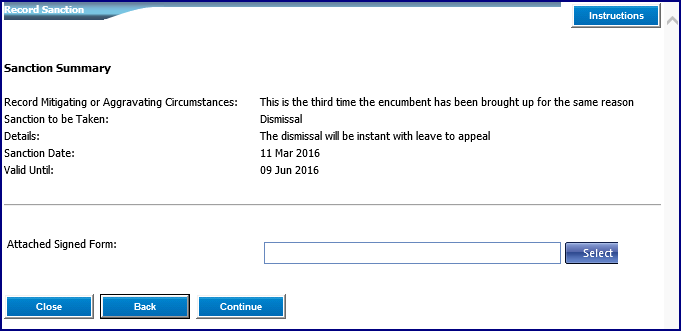
Figure 227 - Sanction Summary